

Seedream 5.5 Pro AI Image Generator & Editor

Explore a new direction for professional image creation with Seedream 5.5 Pro: richer creative briefs, carefully planned text and layouts, and close attention to the people and products that define your image. Bring your ideas, references, and exact wording together around one goal: a design that is easier to refine and carry into your next project.

Create or Edit an Image

Mode
0/5000
Aspect Ratio
Resolution
Output format
Advanced Settings (Optional)
Background
Required credits
4

Sample Images

Three portraits of the same woman with different backgrounds, jacket colors, and a scarf

Creative Directions for Seedream 5.5 Pro

Amber perfume bottle arranged with lilac fabric and pale stone

Seedream 5.5 Pro

Amber perfume bottle arranged with lilac fabric and pale stone

Bronze table lamp on a bedside table in a softly lit bedroom

Product Photography with Brand Details at the Center

Bronze table lamp on a bedside table in a softly lit bedroom

Illustration of neighbors reading beside a courtyard bookshelf

Posters, Multilingual Text, and Clear Information Layouts

Illustration of neighbors reading beside a courtyard bookshelf
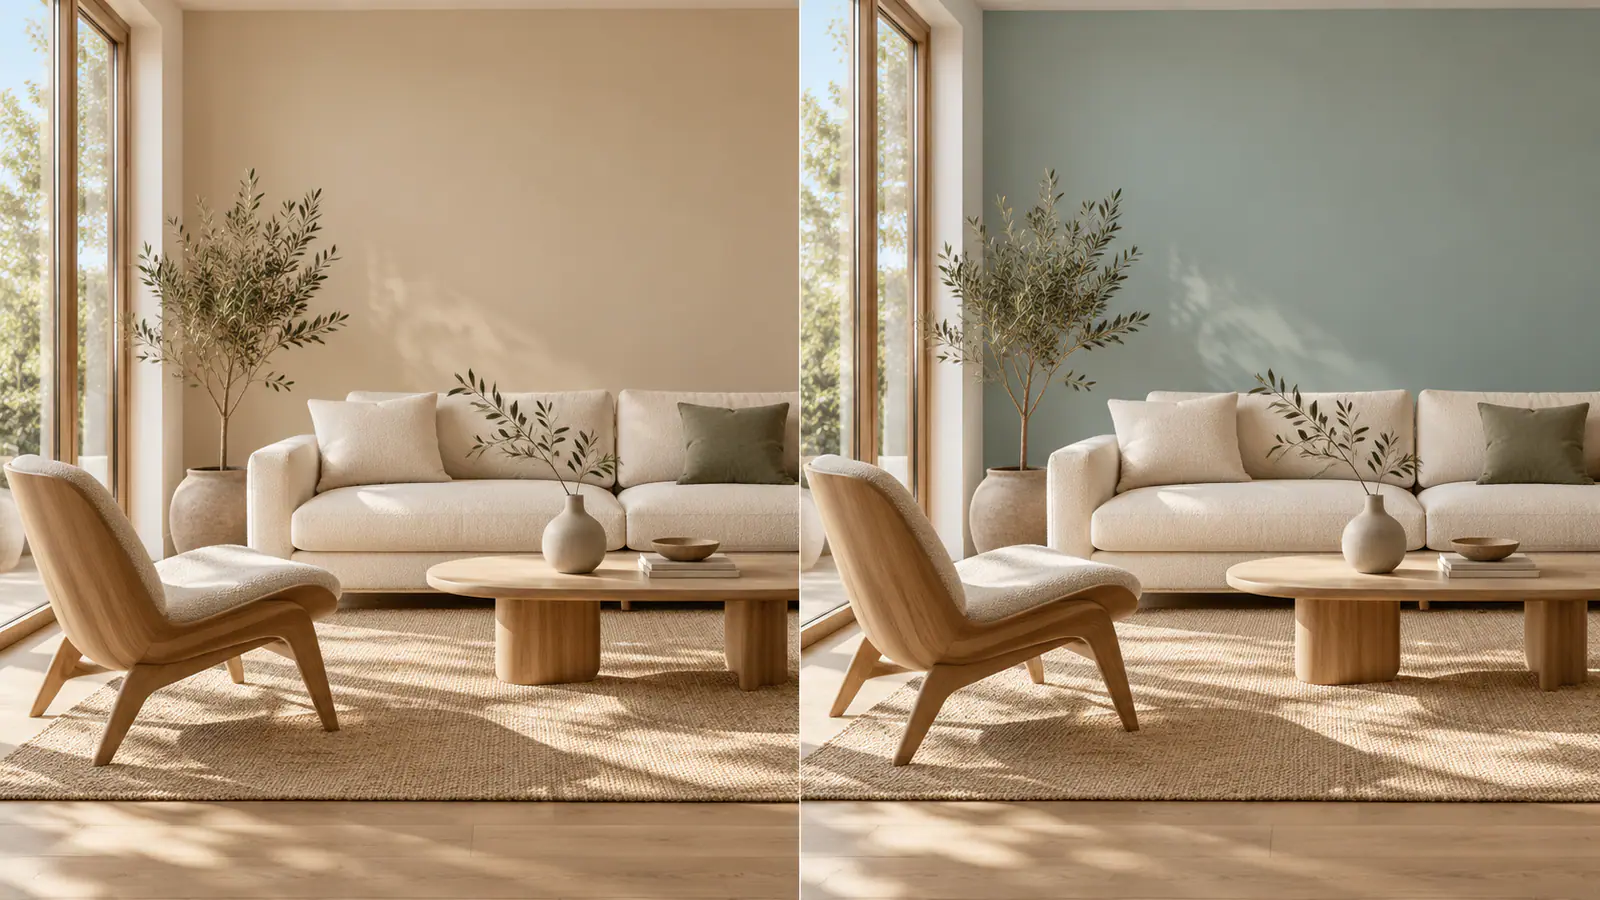
Room comparison with the same furniture and beige or sage blue walls

Precise Image Editing That Respects the Rest of the Scene

Room comparison with the same furniture and beige or sage blue walls

From Complex Creative Briefs to Detailed Visual Design

The creative ambition behind Seedream 5.5 Pro is to bring more of a demanding brief into the finished image: the right subject, the right words, a deliberate layout, and details that hold through revisions. Explore four design tasks where that precision matters most.

Product Photography with Brand Details at the Center

A product campaign in AI Product Photography starts with the details that make an item recognizable: its silhouette, packaging color, label, logo, and proportions. Build the scene around those details, then specify the surface, lighting, camera angle, and space for campaign copy. For a perfume brief, place the bottle on pale stone with soft side light and a natural reflection while asking to retain the label and glass shape. For a bedside lamp, define the metal finish, shade texture, and warm pool of light. The professional design goal is to combine convincing materials with faithful product identity, so a new setting feels like another photograph of the same item. Give each reference a clear role and name the features that must carry across the composition.
Plan a Product Image
Bronze table lamp on a bedside table in a softly lit bedroom

Posters, Multilingual Text, and Clear Information Layouts

A strong poster needs more than an attractive background. The headline, date, location, prices, and call to action must form a clear reading order. Plan those relationships in the brief: a large title above the scene, supporting details in a quiet area, and prices beside the correct options. Supply the exact wording in quotation marks, including names, numbers, and punctuation. For multilingual designs, specify the language, reading direction, and room for longer lines. An infographic adds another layer: each label needs to belong to the right object or data point. This is the text and layout direction at the heart of the Pro concept: bringing complete copy and visual hierarchy together, from an illustrated reading event to a detailed product launch poster.

Plan a Poster Layout
Illustration of neighbors reading beside a courtyard bookshelf

Precise Image Editing That Respects the Rest of the Scene

A useful revision changes the part you name while respecting the composition you have already chosen. Describe an edit as two connected instructions: what to change and what to preserve. Change a room wall to sage blue while retaining the furniture, window, floor pattern, and camera angle. Then use the accepted result for a second revision, such as a different lampshade or softer evening light. The Pro editing ambition is finer control over these relationships, including shadows, reflections, and the way one object overlaps another. Keep the brief focused on the current revision and retain the versions you approve. That makes a series of changes easier to direct, from a small color adjustment to a new setting around the same subject.

Refine an Image
Room comparison with the same furniture and beige or sage blue walls
Consistent People, Clothing, and Character Details

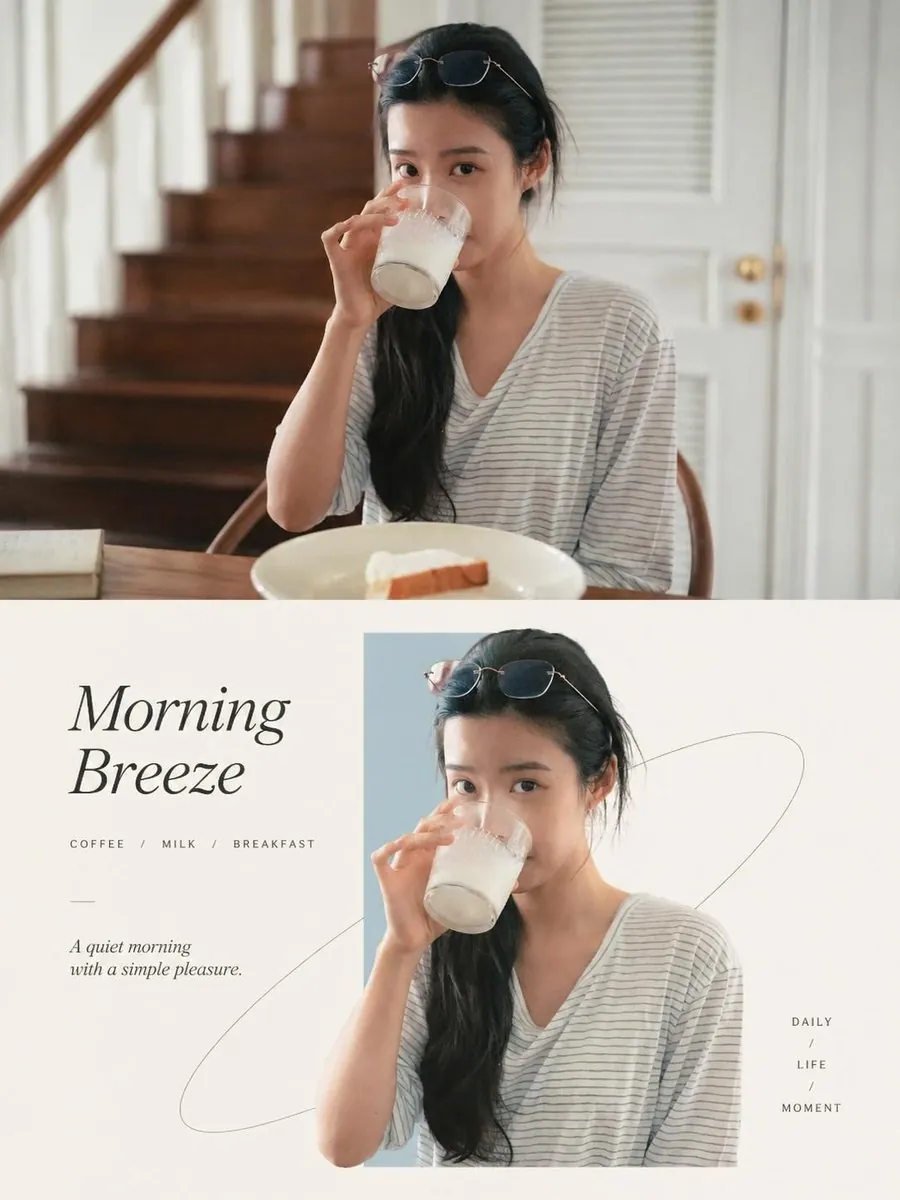
Portrait and character work depends on a recognizable person carrying through changes in styling, pose, and setting. Begin with a clear reference and identify the face, hairstyle, expression, and clothing details that define the subject. Then describe the variation: a different jacket color, an added scarf, or a new background with matching light. For a group composition, assign each person a position and distinguish their clothing and accessories. The design target is stronger identity preservation alongside natural skin, hair, fabric, and jewelry. A campaign series can use the same subject description, palette, and lighting brief across individual images. Review the face and defining details together, so the collection has a coherent visual identity as well as a consistent mood.

Plan a Portrait Variation
Three portraits of the same woman with different backgrounds, jacket colors, and a scarf

Turn Your Creative Brief into an Image

Start with the outcome, explain the details that matter, and refine one clear direction. Use Text to Image for a new composition or Image to Image for a reference you want to develop.

  1. Define the task and reference roles

    Choose a concrete task: a product scene, event poster, portrait variation, or focused image edit. Add the references needed to explain it, and assign each a role. For example, use the first image for the product, the second for lighting, and the third for composition. Put the most important requirements first.

  2. Specify text, layout, and details to keep

    Describe the subject, visual hierarchy, lighting, and final use. Quote the exact text and place it in the composition. For an edit, name both the change and the details to retain: the face, logo, label, colors, or background. Separate essential requirements from optional styling so the brief has a clear priority.

  3. Generate, review, and develop the result

    Choose the model and output settings available in the workspace, then review the displayed credit cost before generating. Inspect the image at its intended viewing size, including text, faces, product labels, and edges. Download the version you want to keep. To refine it, upload that result as a reference and describe the next change.

A Professional Design Workflow Beyond the First Image

The broader Pro direction connects detailed instructions with reusable design assets. These are the priorities that matter when an image needs to become a campaign, a large format composition, or a design you can keep editing.

Complex Instructions and Multiple References

Give each source a job: product identity, pose, light, palette, or layout. Specify where subjects belong, how large they should appear, and which elements may overlap. The key ambition is more reliable execution of several requirements together, rather than simply adding more reference slots. A detailed brief should carry its priorities all the way into the composition.

Transparent Assets for Flexible Compositions

Think in reusable elements: an isolated product, a character, decorative lettering, or a translucent glass object. Plan a complete outline and space around the edges so the asset can sit naturally over different backgrounds. Transparent PNG is the useful delivery format for this workflow. Fine hair, soft edges, and semi-transparent materials are the details that make an isolated element easier to reuse.

4K Detail for Larger Design Work

4K is a valuable direction for the Pro design workflow: more room for small poster text, packaging detail, fine material textures, and flexible crops. The goal is meaningful detail that holds up when viewed closely, combined with precise editing and clean asset edges. Plan the final dimensions and viewing distance first; choose from the resolution options shown for your selected model when generating.

Editable Layers and Text for the Next Revision

A useful design handoff separates what you will need to change: the product, background, decoration, and text. The workflow to aim for is an image draft, separate visual elements, a text or product revision, and a final composition. Clean boundaries, sensible stacking, and accurate text placement matter here. Keep final typography and assembly in your design editor, with reusable image assets alongside the source copy.

Create or Edit an Image

Bring a product, a portrait, or a poster idea to Seedream 5.5 Pro. Define the words, layout, and details that matter, then open the workspace to start shaping your image.

Start Creating

Creative Briefs to Try at Seedream 5.5 Pro

Explore image models

Seedream 5.5 Pro FAQ

Explore the creative priorities, reference workflows, poster briefs, resolution choices, and editing needs behind Seedream 5.5 Pro.

Our Seedream 5.5 Pro vision centers on complex design tasks: understanding several instructions together, organizing text and layout, preserving people and product details, and preparing images for further editing. The emphasis is on how closely a result follows a complete brief. A campaign poster, a detailed product scene, and a carefully revised portrait all put that ambition to work in different ways.

The most useful advance would be a higher proportion of the brief carried into the result: fewer missing details, more complete text, clearer relationships between elements, and better preservation during edits. Higher resolution and reusable assets add value when they work together with that accuracy. For a commercial brief, assess the complete task: the product, headline, layout, and revision requirements, rather than judging only the first visual impression.

Give Your Next Design a More Complete Brief

Bring a product, a portrait, or a poster idea to Seedream 5.5 Pro. Define the words, layout, and details that matter, then open the workspace to start shaping your image.