

Loading...

AI Exploded View Generator

Images
Visual Style
0/5000
Aspect Ratio
Resolution
Output format
Required credits
4

Sample Images

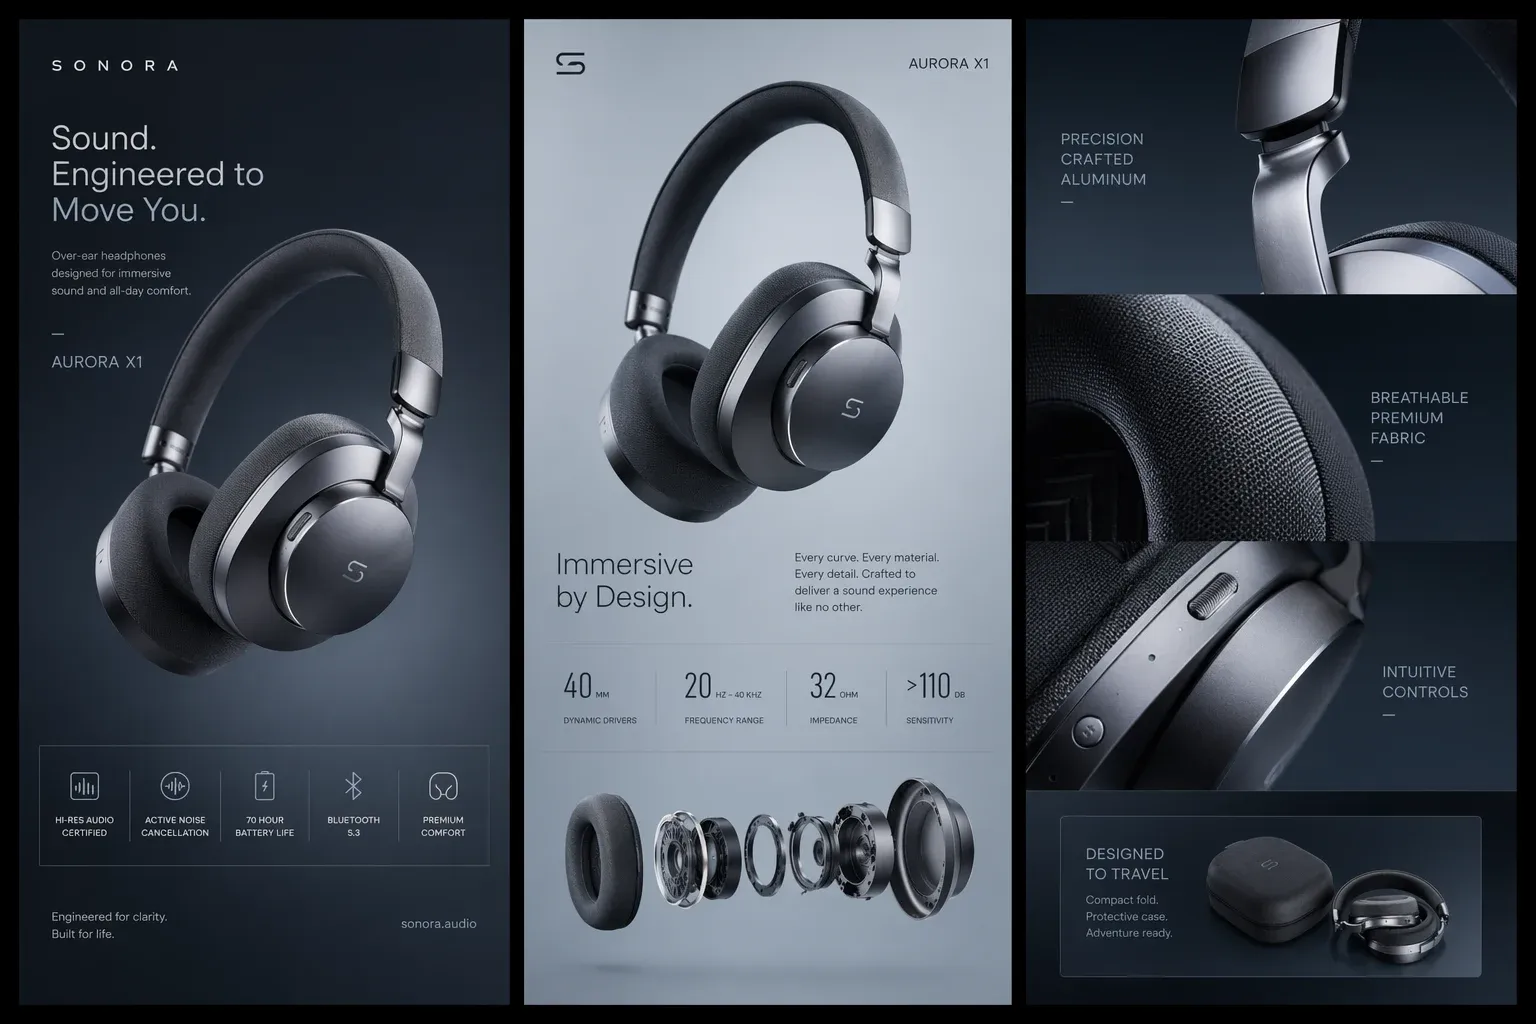
Concept campaign showing assembled over-ear headphones and an exploded row of earcup components

How to Create an Exploded View from a Photo

Use the AI Exploded View Generator on Seedream 5.5 Pro to turn a product photo into a separated-parts illustration. An exploded view diagram spaces components apart while keeping their relationship readable. Start with one reference image, describe which pieces to separate, and choose a composition for a product listing, design proposal, or packaging concept.

  1. Choose a photo with visible joins

    Upload a photo with the whole product in frame and enough contrast to distinguish its edges. A three-quarter angle is useful for showing the top, side, and seams together; an overhead photo suits a flat arrangement. For a travel mug, include the lid, rim, handle, and base. Remove props that overlap the outline, and avoid a tight crop through the part you want to separate. Use the version of the product you actually want to illustrate.

  2. Select a style and describe the parts

    Choose Studio Stack for a shaded product composition, Assembly Diagram for a simple illustrated layout, or Parts Flat Lay for an overhead arrangement. Each preset fills Image Prompt so you can adjust the brief. Name the pieces, their order, and the direction they should move. For the mug, request the lid above the body, with the handle attached. Add the background and viewing angle last so the part relationships remain the main instruction.

  3. Frame the layout and generate

    Choose an Aspect Ratio in Settings that gives the separated pieces room. A vertical stack suits a tall frame; a horizontal row needs space on both sides. Keep a margin around the outer pieces if you will crop the image into a listing card. Select Generate, open the result, and inspect the arrangement before downloading. When revising, change one instruction at a time so you can tell whether spacing, viewpoint, or the chosen parts improved the image.

Product Exploded Views for Three Different Briefs

Choose the message before choosing how many parts to show. A shopping image should explain a product feature, a proposal should make a design choice visible, and a kit layout should clarify what belongs together. Give each image one job so the composition remains easy to read.

Explain a removable feature in a listing

Use a product exploded view beside an assembled product photo to explain a feature buyers might miss. For a refillable fragrance bottle, a brief could separate the cap and confirmed refill while leaving the pump attached. Match the finish and variant shown elsewhere in the listing, and keep optional accessories out of the main arrangement. Place the image beside copy explaining what is included or replaceable. That pairing connects the visual to a practical buying question instead of presenting a decorative pile of parts.


Amber fragrance bottle with a sculpted gold cap on a light stone display

Make a design choice easier to compare

For a lamp proposal, separate the shade from the stem and base to focus discussion on proportion. Keep electrical fittings enclosed when the decision concerns the outside shape. If you prepare alternatives, use the same angle, background, and product scale in each brief; then change only the feature being compared. Put a short question beside the image in your presentation, such as whether a wider shade balances the base. The illustration becomes a focused conversation about the design rather than a general style reference.

Assembled brass table lamp with a dome shade and cylindrical base

Plan a kit and its packaging layout

Use a parts flat lay to discuss the contents of a gift set, toy kit, or packaging concept. Describe the main item, accessories, insert, and box as separate groups. Put the accessory near the item it belongs to and the packaging to one side, so viewers can distinguish product components from presentation materials. Specify whether the box is open or closed. This brief helps you explore the arrangement for an unboxing slide or packaging review before deciding which objects need their own close-up images.

Mushroom toy figure with a small watering can beside its leaf-patterned box

Refine Your Exploded View Diagram Before Sharing

Keep the product recognizable

Compare the illustration with your reference at the same viewing size. Look at the outline, finish, handle shape, and any feature that identifies the variant. Choose two or three details to name explicitly in a revision, such as a matte black body and a squared handle. This gives the next prompt a specific visual target instead of a broad request to make the product look more accurate.

Make each connection easy to follow

Follow the path from each separated part back to the main body. A cap and opening should share a clear center line; paired edges should face each other. Adjust gaps where overlapping silhouettes hide a connection. Keep related pieces closer together than unrelated accessories, and retain one consistent viewpoint across the image. The arrangement should explain where a piece belongs without requiring the viewer to guess from its shape alone.

Use references for internal details

For an exploded view drawing that includes internal parts, use a known parts list or an open-assembly photo to guide the brief. Name the pieces you want to show and keep the remaining subassemblies enclosed. Pair the illustration with engineering drawings for manufacturing dimensions or manufacturer instructions for a repair procedure.

Leave room for readable callouts

Start with an uncluttered image and add verified part names in your presentation or design editor. Place callouts near their components and keep connecting lines away from edges that define the object. Check the finished layout at the size of a phone screen or slide, especially when several small parts sit together. Use the same names in the image and accompanying copy so a reader can move between them easily.

AI Exploded View Generator FAQ

This page creates a still image. Choose an available Output format in Settings and download the result for your layout or presentation. For motion, use a separate animation workflow with the assembled photo and separated view as visual references. Plan that sequence around the same camera angle and part order so the two images describe the same product arrangement.

You receive an image of the complete exploded arrangement, with perspective and shading to illustrate the parts and their positions. Download it for a listing, presentation or design review, and add labels in your layout editor. For dimensional measurements, rotating individual components or manufacturing geometry, continue in a CAD project with the component models.

Create an Exploded View That Explains Your Product

Bring a product photo to Seedream 5.5 Pro, pick the pieces your audience needs to see, and build a clear brief. Start your exploded view for a listing, proposal, or kit presentation.